
How-To Replace A Piston Valve Assembly
This document shows how to replace a piston valve assembly
Piston/Cylinder Assembly
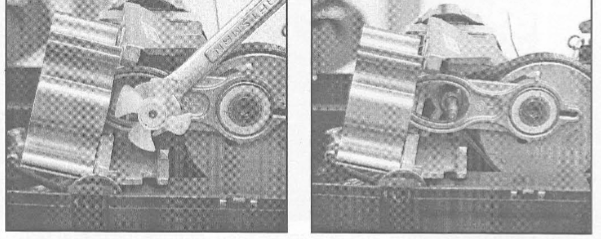
1. Using a small wrench or other tool, pry off the piston fan. Use the least amount of force possible to avoid damaging the fan.
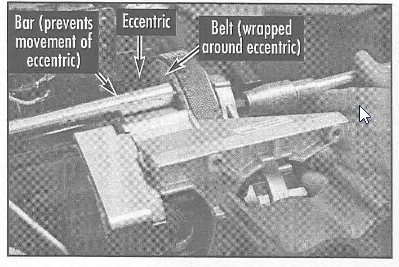
2. Before removing the piston, you must first prevent movement of the eccentric. Do this by placing a wrench handle or socket wrench extension bar in the eccentric. Make sure the tool you are using is sturdy enough to hold the eccentric and belt in place.
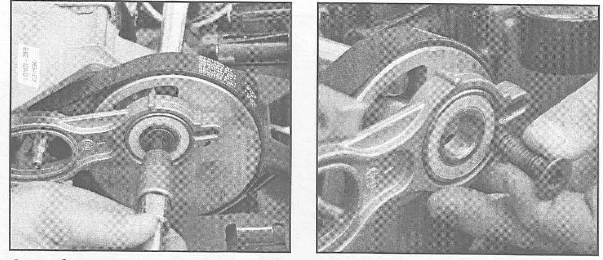
3. Once the eccentric and belt are secured, remove the piston bolt. Use a hex bit or Torx bit, depending on the kind of piston bolt.
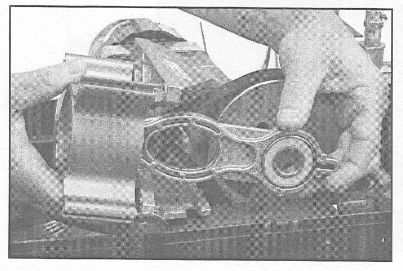
4. Remove piston and cylinder
5. Reassemble piston/cylinder and piston bolt. Tighten piston bolt to 400 in-lbs. (If unit is an FP2200 series model tighten piston bolt to 120 in-lbs.)
Note: Make sure socket wrench extension bar is still in place to prevent movement of eccentric. When reinstalling piston bolt, use a new one, or use removable Loctite on the threading of the old one.
6. Remove socket wrench extension from eccentric.
7. Reattach piston fan. Make sure that metal ring on fan faces away from pump.
8. Reassemble head/valve assembly. Tighten head bolts to 120 in-lbs. Apply torque in one-third increments using an "X" pattern. (If your unit is an FP2200 series model, tighten head bolts to 90 in-lbs.)
9. With Philips screwdriver, loosen (but do not remove) motor strap bolt.
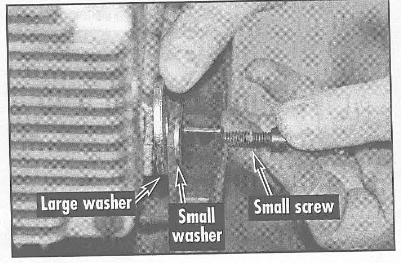
10. Place a small washer between plastic shroud and tank base tab. Insert screw through tank base tab. Place large washer on screw between tank base tab and pump housing. Tighten to 150 in-lbs. Then tighten motor strap bolt to 150 in-lbs.
11. Reinstall exhaust tube at head connection. Tighten exhaust tube compression nut until rubber ferrule begins to squeeze out. Reinstall shroud.
Note: When reinstalling exhaust tube, use a new rubber ferrule.
Recent Posts
-

The Heart of Your Pump: Understanding Pump Intake & Exhaust Valves & Their Failures
At Master Tool Repair, we talk to customers every day who are frustrated by a compressor that just i …Mar 19, 2026 -

Boost Efficiency: The Benefits of Quick-Connect Couplings
Have you ever found yourself wrestling with threaded fittings while trying to swap out air tools, lo …Mar 11, 2026 -

How to Choose the Right Replacement Pump: Oil-Free vs Oil-Bath, CFM, and RPM
Replacing a tired air compressor pump is one of the fastest ways to restore airflow, tool performanc …Mar 3, 2026