Don't Let the Cold Catch You: The Essential Winterizing Checklist for Your Air Compressor
The days are getting shorter, and that crisp chill in the air means one thing: winter is coming. For your air compressor, the cold isn't just uncomfortable—it can be downright dangerous. Freezing temperatures can turn trapped moisture into damaging ice, crack seals, and seize up motors.
Protecting your investment is simpler than you think. Follow Master Tool Repair's essential winterizing checklist to ensure your compressor is ready to face the deepest freeze and starts reliably when you need it most.
Steps for Winterizing
Step 1: Eliminate Moisture (The #1 Winter Threat)
Moisture is the single biggest threat to your air compressor in the winter. When temperatures drop below freezing, condensation in the tank and lines turns to ice, which can cause significant damage.
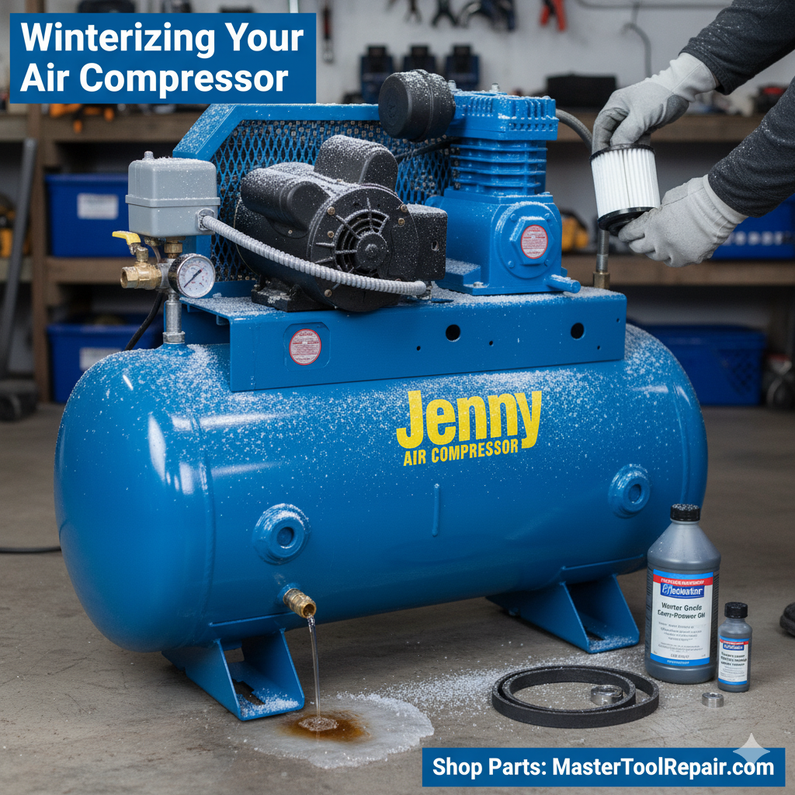
- Drain the Tank Completely: Open the drain valve located at the bottom of the air receiver tank and let it run until all water and sludge have been expelled. If possible, tilt the tank slightly to ensure every drop is removed.
- Drain the Air Lines & Filters: Use the manual drains on your air filters, regulators, and lubricators to purge any residual water.
- Keep the Drain Open (For Storage): If you are storing the compressor for the season, leave the tank drain valve slightly cracked open. This prevents any new condensation from building up and freezing.
Step 2: Check Fluids and Filtration
Cold weather affects the viscosity of oil and the performance of your intake.
- Switch to Winter-Grade Oil (If Applicable): Check your owner’s manual. If you operate in extremely cold conditions, you may need to switch to a lower viscosity (lighter) synthetic oil designed for winter use to ensure smooth starts. Remember, a simple oil change is the cheapest insurance.
- Change the Air Filter: A clogged filter makes your compressor work harder. Winter air is often drier and dustier; replacing the filter ensures maximum efficiency and protects internal components (shop replacement filters here).
Step 3: Inspect and Protect Components
A quick inspection can prevent a major component failure come spring.
- Check Belts and Hoses: Cold rubber can become brittle. Inspect all hoses and drive belts for cracks, brittleness, or excessive wear. Replace any components that show signs of damage. Master Tool Repair has the exact belts and hoses you need!
- Use Anti-Freeze (For Pneumatic Tools): If you are using air tools in freezing temperatures, a few drops of air tool oil or pneumatic anti-freeze lubricant can be directly applied to the tool's air inlet to prevent internal parts from freezing up.
- Lubricate the Pump: If your compressor is an oil-lubricated model, ensure the oil level is correct. If it’s an oil-less model, ensure the bearings are operating smoothly.
Step 4: Proper Storage (Location, Location, Location)
Where you store your compressor is crucial.
- Move Indoors: Whenever possible, store your compressor in a climate-controlled area, like a heated garage, shop, or warehouse.
- Avoid Extreme Cold: If indoor storage isn't an option, use a protective cover and keep it elevated off the cold, damp ground. Never store a compressor outdoors exposed to the elements.
Skipping a step on this checklist could mean replacing a frozen air tank, a cracked pump, or a seized motor. Don't wait until the first freeze damages your equipment!
Master Tool Repair has everything you need to successfully winterize your air compressor, including:
- Replacement Filters
- Gaskets and Seals
- Hoses, Belts, and Fittings
- Air Compressor Oil
Recent Posts
-
Troubleshooting Your Air Compressor When Your Motor Just Hums, Clicks, or Won't Start
There’s no sound more frustrating in a workshop than the failed attempt of an air compressor to star …Dec 17, 2025 -
Air Compressor Pressure Switches: Beyond the Basics of Adjustment
The Brain of the Beast: Understanding Your Pressure Switch The pressure switch is the unsung hero of …Dec 10, 2025 -
The Breath of the Pump: Why Your Air Compressor Needs a Healthy Crankcase Breather/Vent
Your air compressor is a powerhouse, a workhorse essential to your operation. We all know the import …Dec 4, 2025


