How-To Install A 130/165 Valve Plate Assembly
- Take head bolts (8) out and remove the head.
- If the valve plate is not removed with the head, then lift it off of the cylinder by holding each end and gently lifting it. If it will not come off by hand, use a rubber mallet and knock it off by tapping the bottom edges of the valve plate in an upwards motion; do not remove the valve plate by hitting the side of the plate!
- Make sure to remove all gasket material off of the valve plate, head and cylinders. This can be done by using Scotchbrite (green teflon scrubby) to polish up the aluminum on a flat surface.
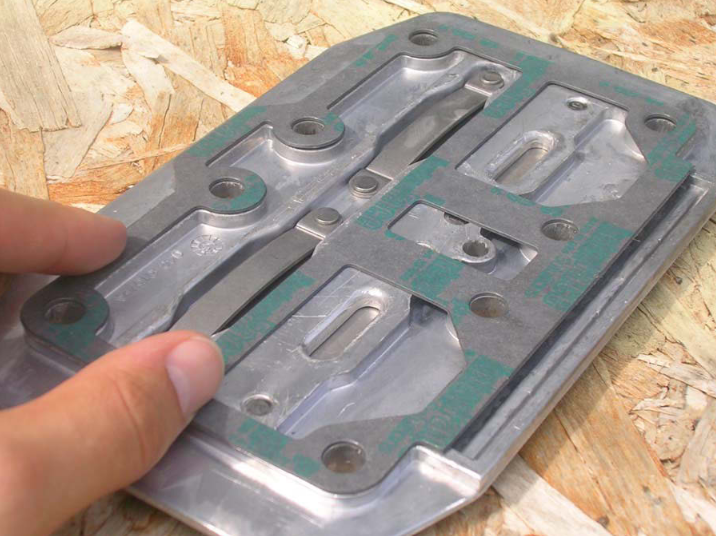
- Install the new cylinder gasket on the cylinder; use a light coating of Vaseline on the edges of the gasket to keep it in place on the cylinder.
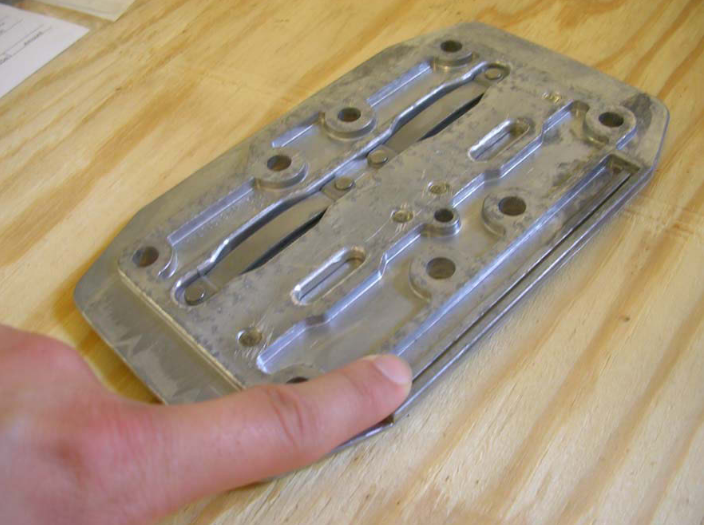
- Install the new valve plate. Make sure holes in the valve plate line up with the holes in the gasket! The valve plate must be installed with the rectangular groove (which is shown in the photo, below) facing up, on the air intake (inlet) side of the pump head. Warning: Installing it backwards will pump air out of the intake filter!


- Install and hold the filter screen in the groove in the valve plate (pictured).
- Install the felt filter element in front of the filter screen towards the outside of the valve plate.
- Install the head gasket, applying more Vaseline on the gasket to keep it in place. Make sure your filter element and screen fit into the head.
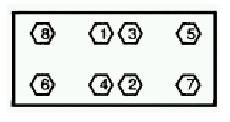
- Torque the head bolts down to in between 220 to 300 in./lbs. (or 18.5 to 25 ft./lbs.) using a torque wrench.
- Torque head bolts in a sequence starting with the inside bolt, going outwards in an “X” pattern (pictured below).

